Slack MCP in amber for Administrators
The contents of Slack chats, channels and groups are easily accessible in the amber AI chat through the MCP server that Slack provides. This manual gives an overview of the steps needed for the integration of said MCP server.
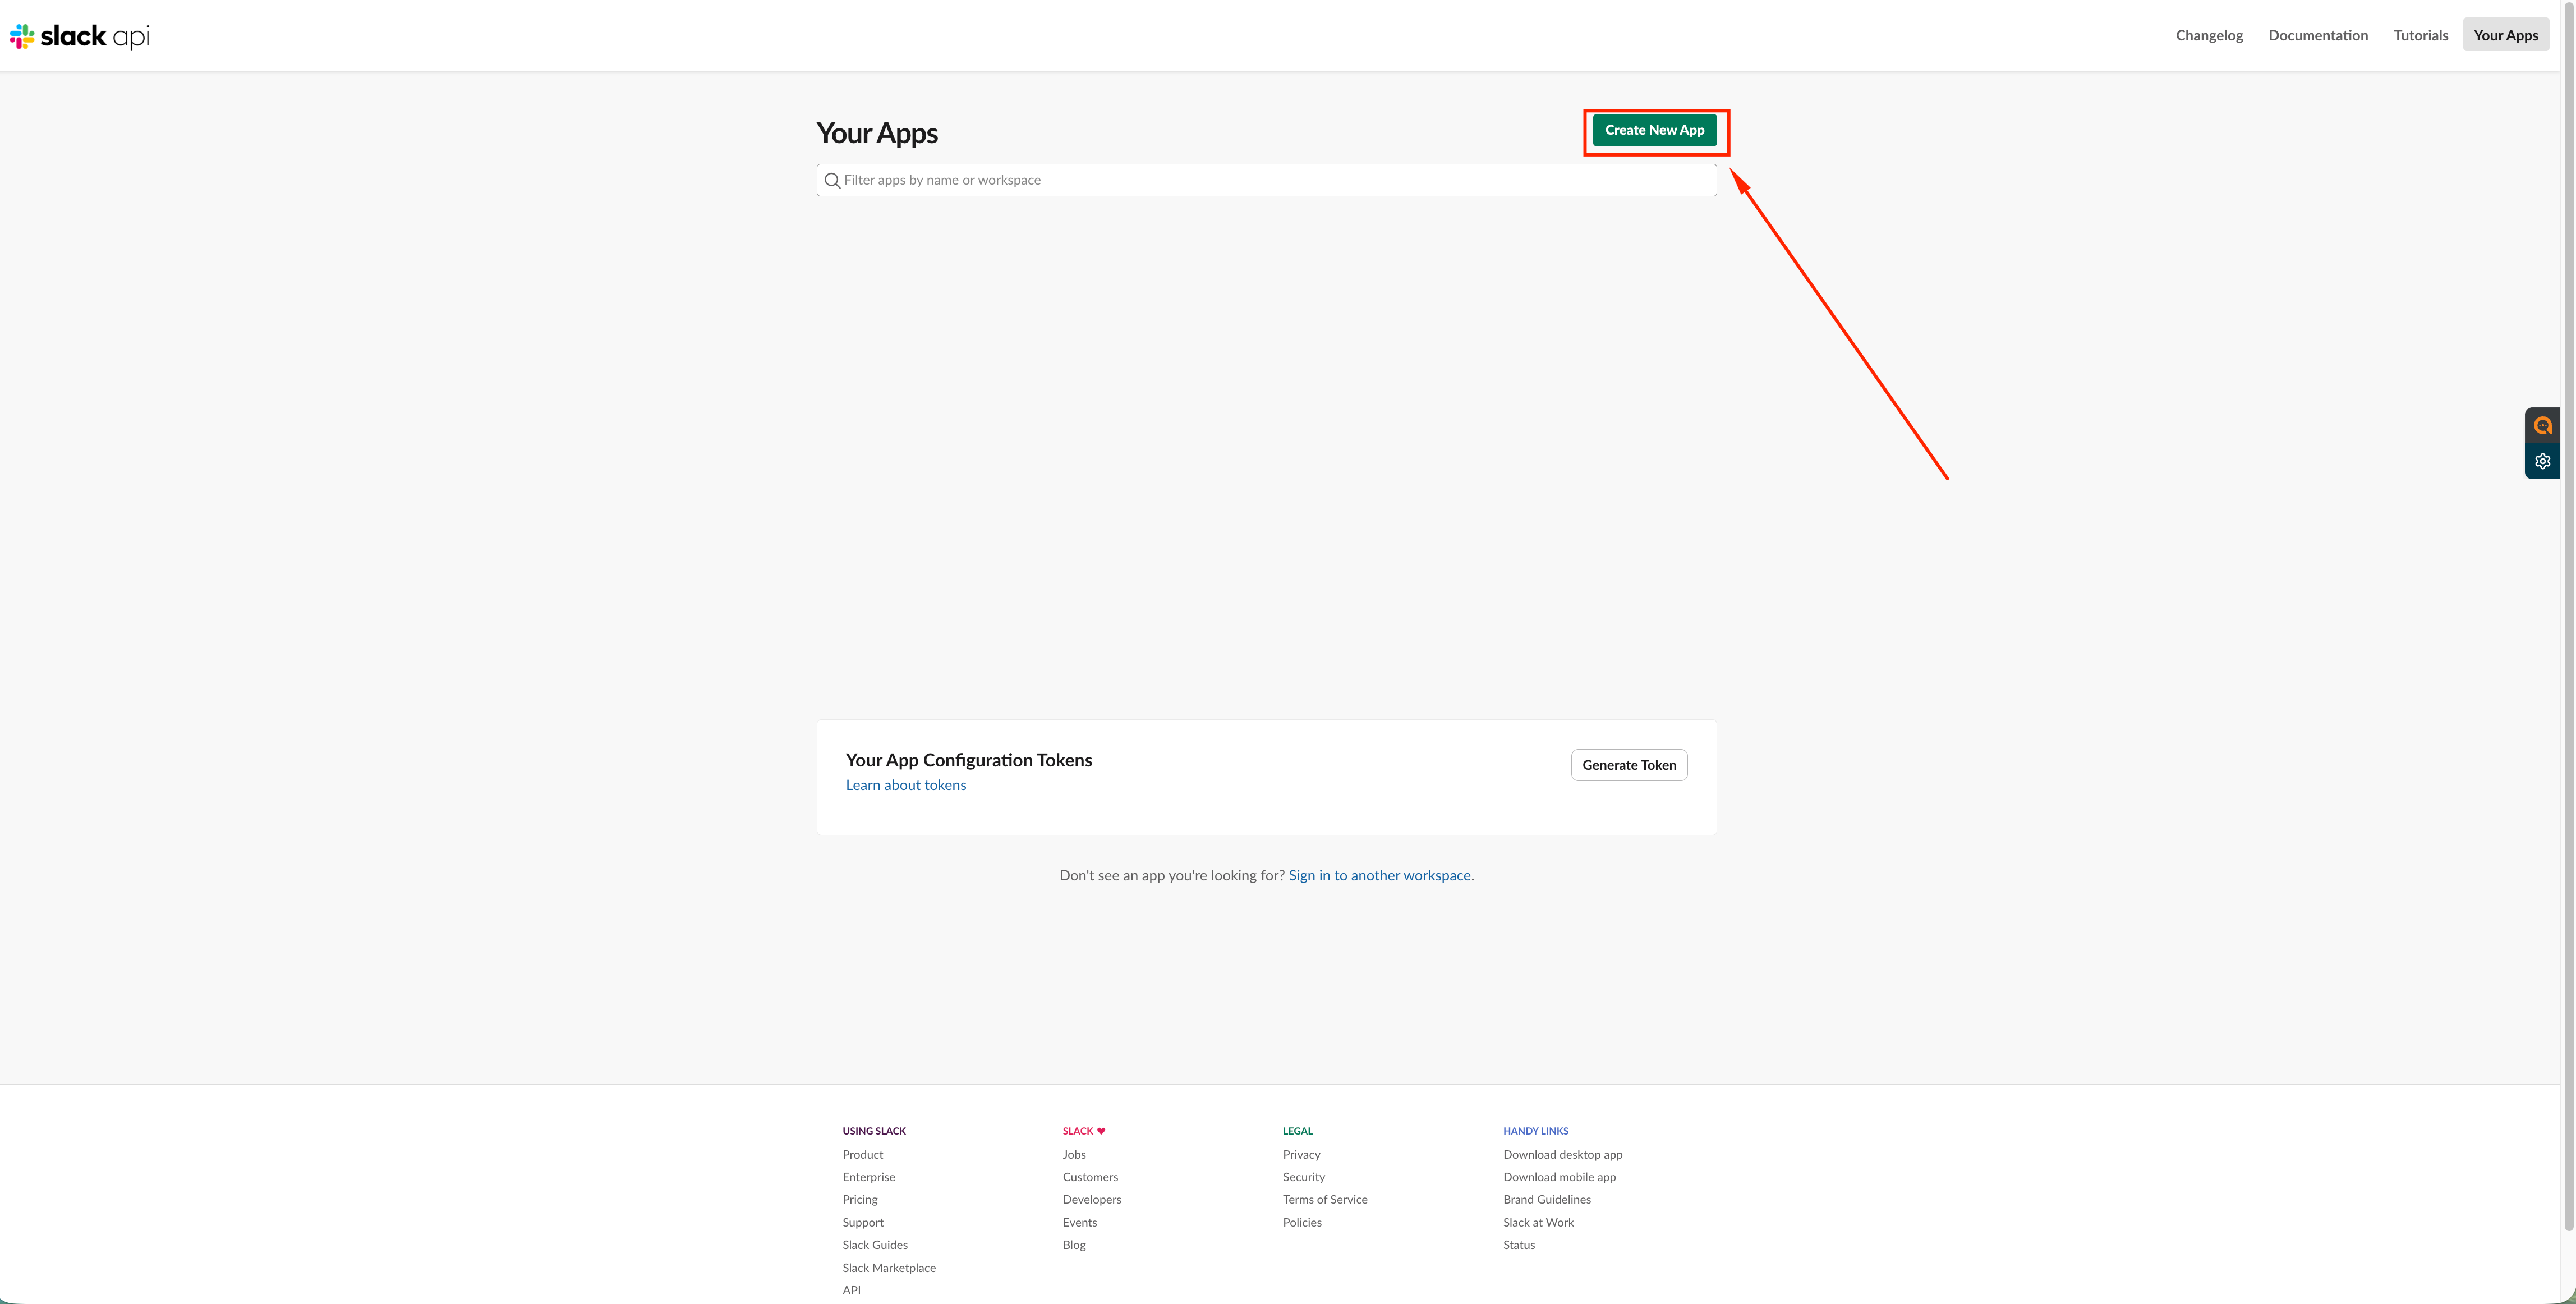
Navigate to the https://api.slack.com/apps page.
Create an app as demonstrated in the screenshot:
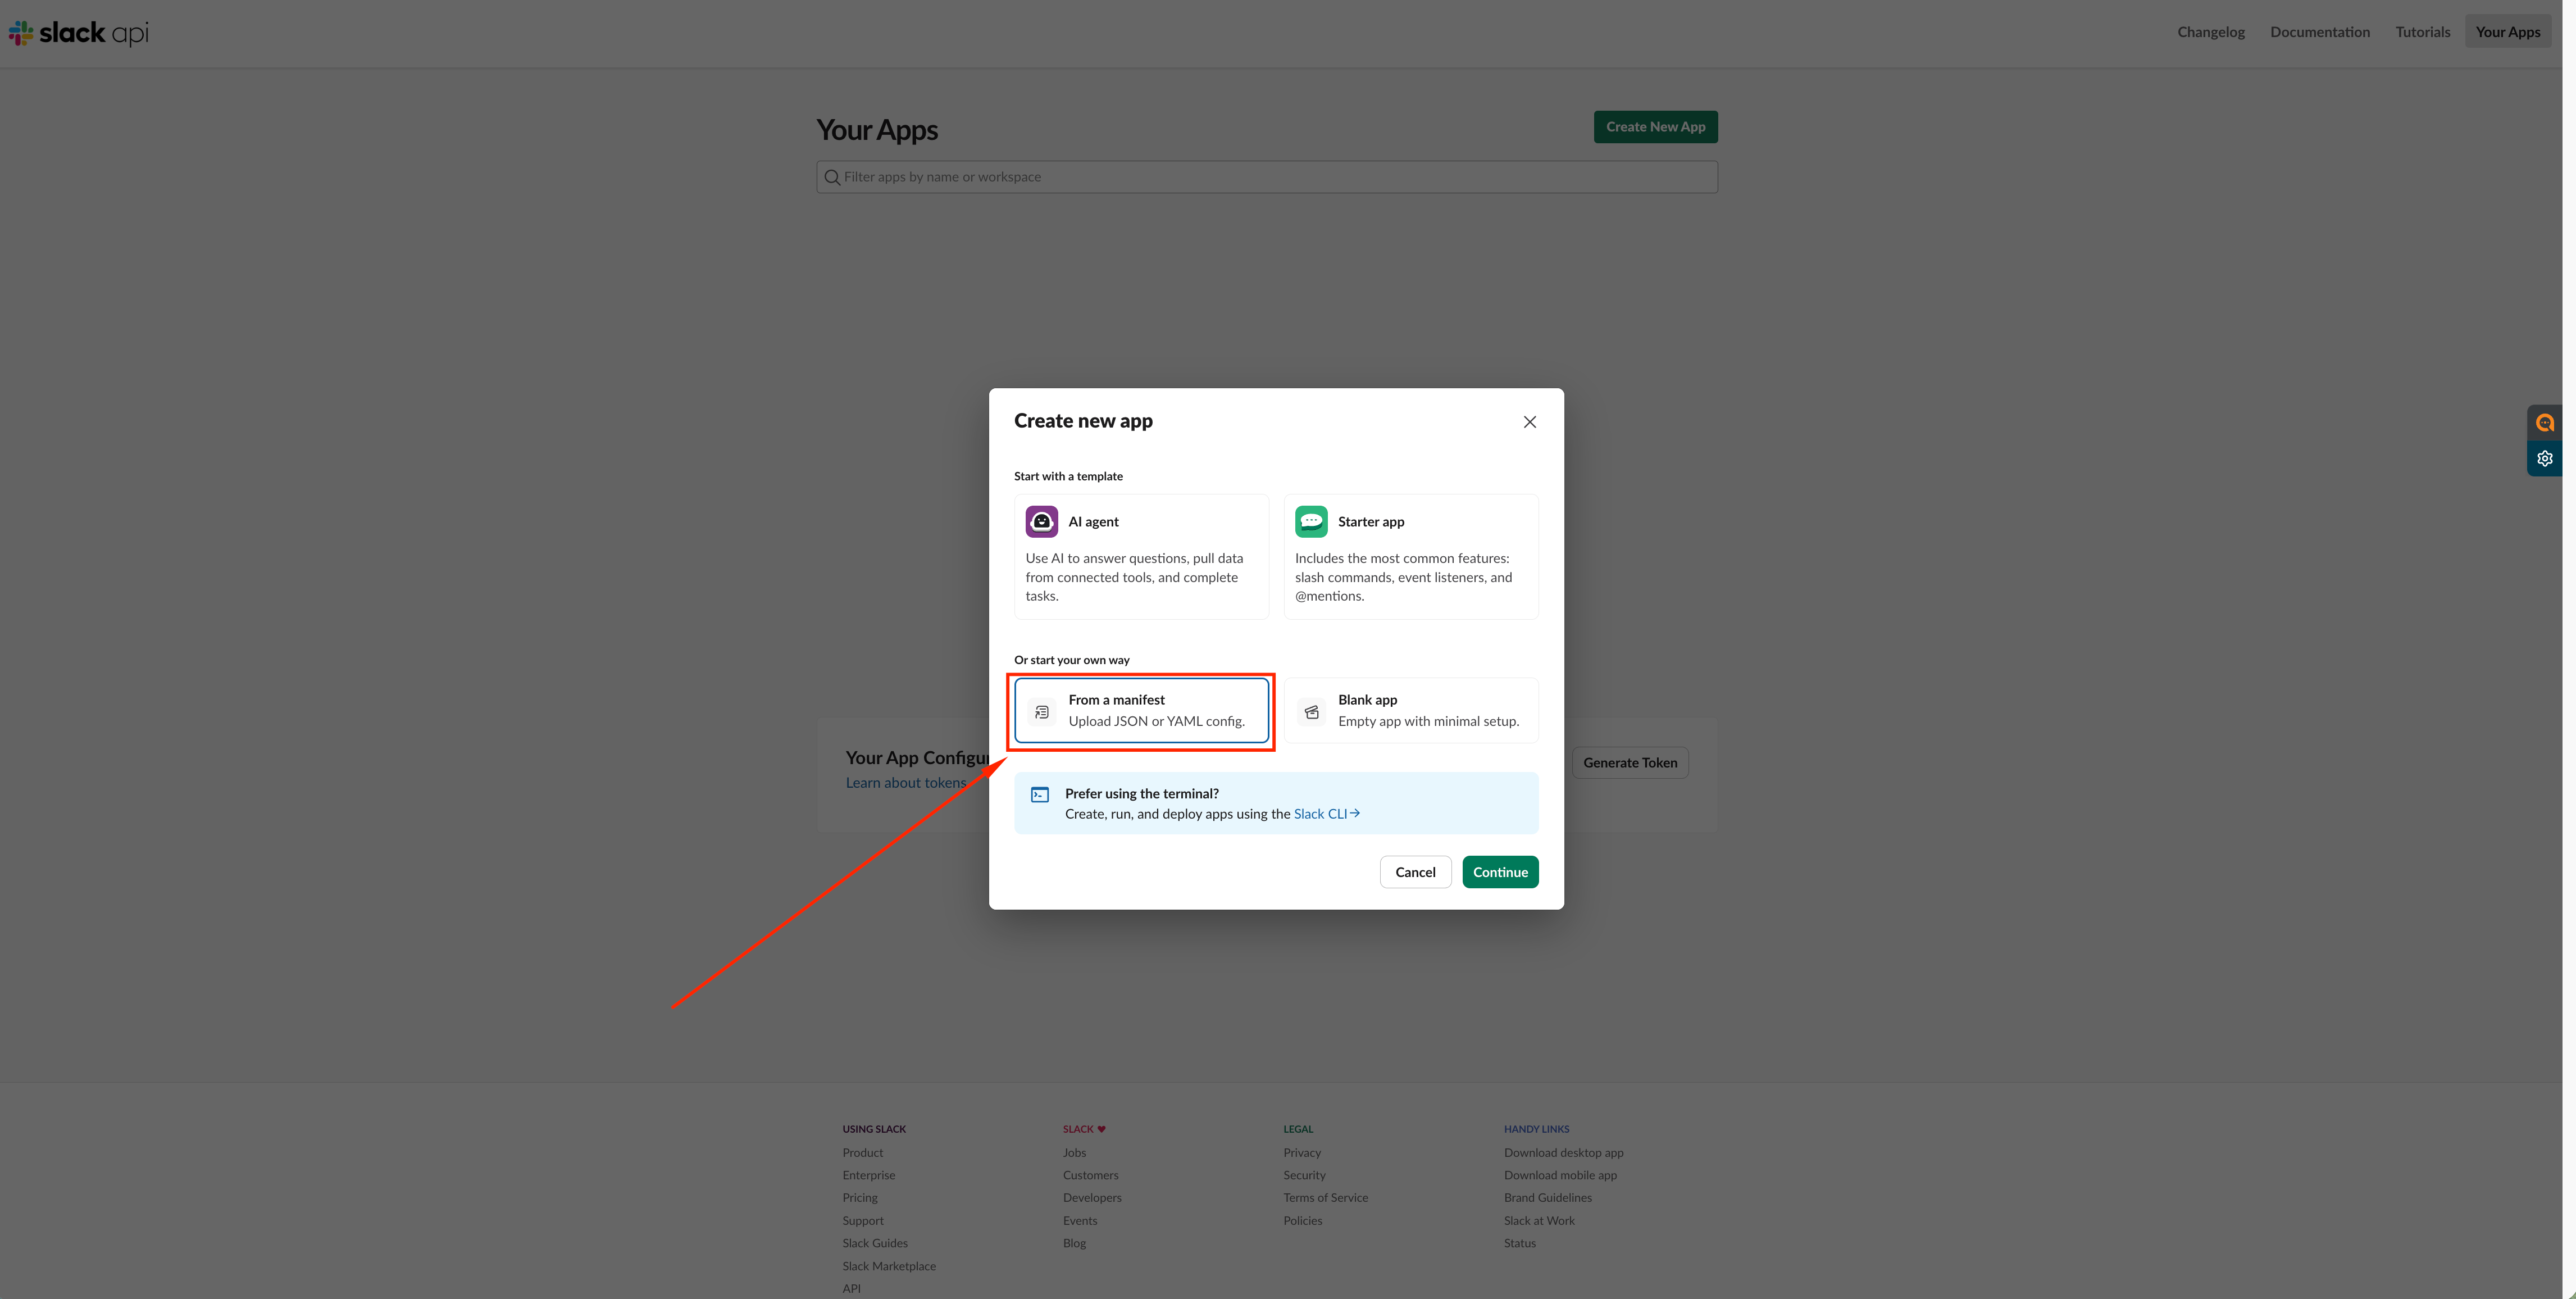
Once on the create app modal choose to upload a manifest:
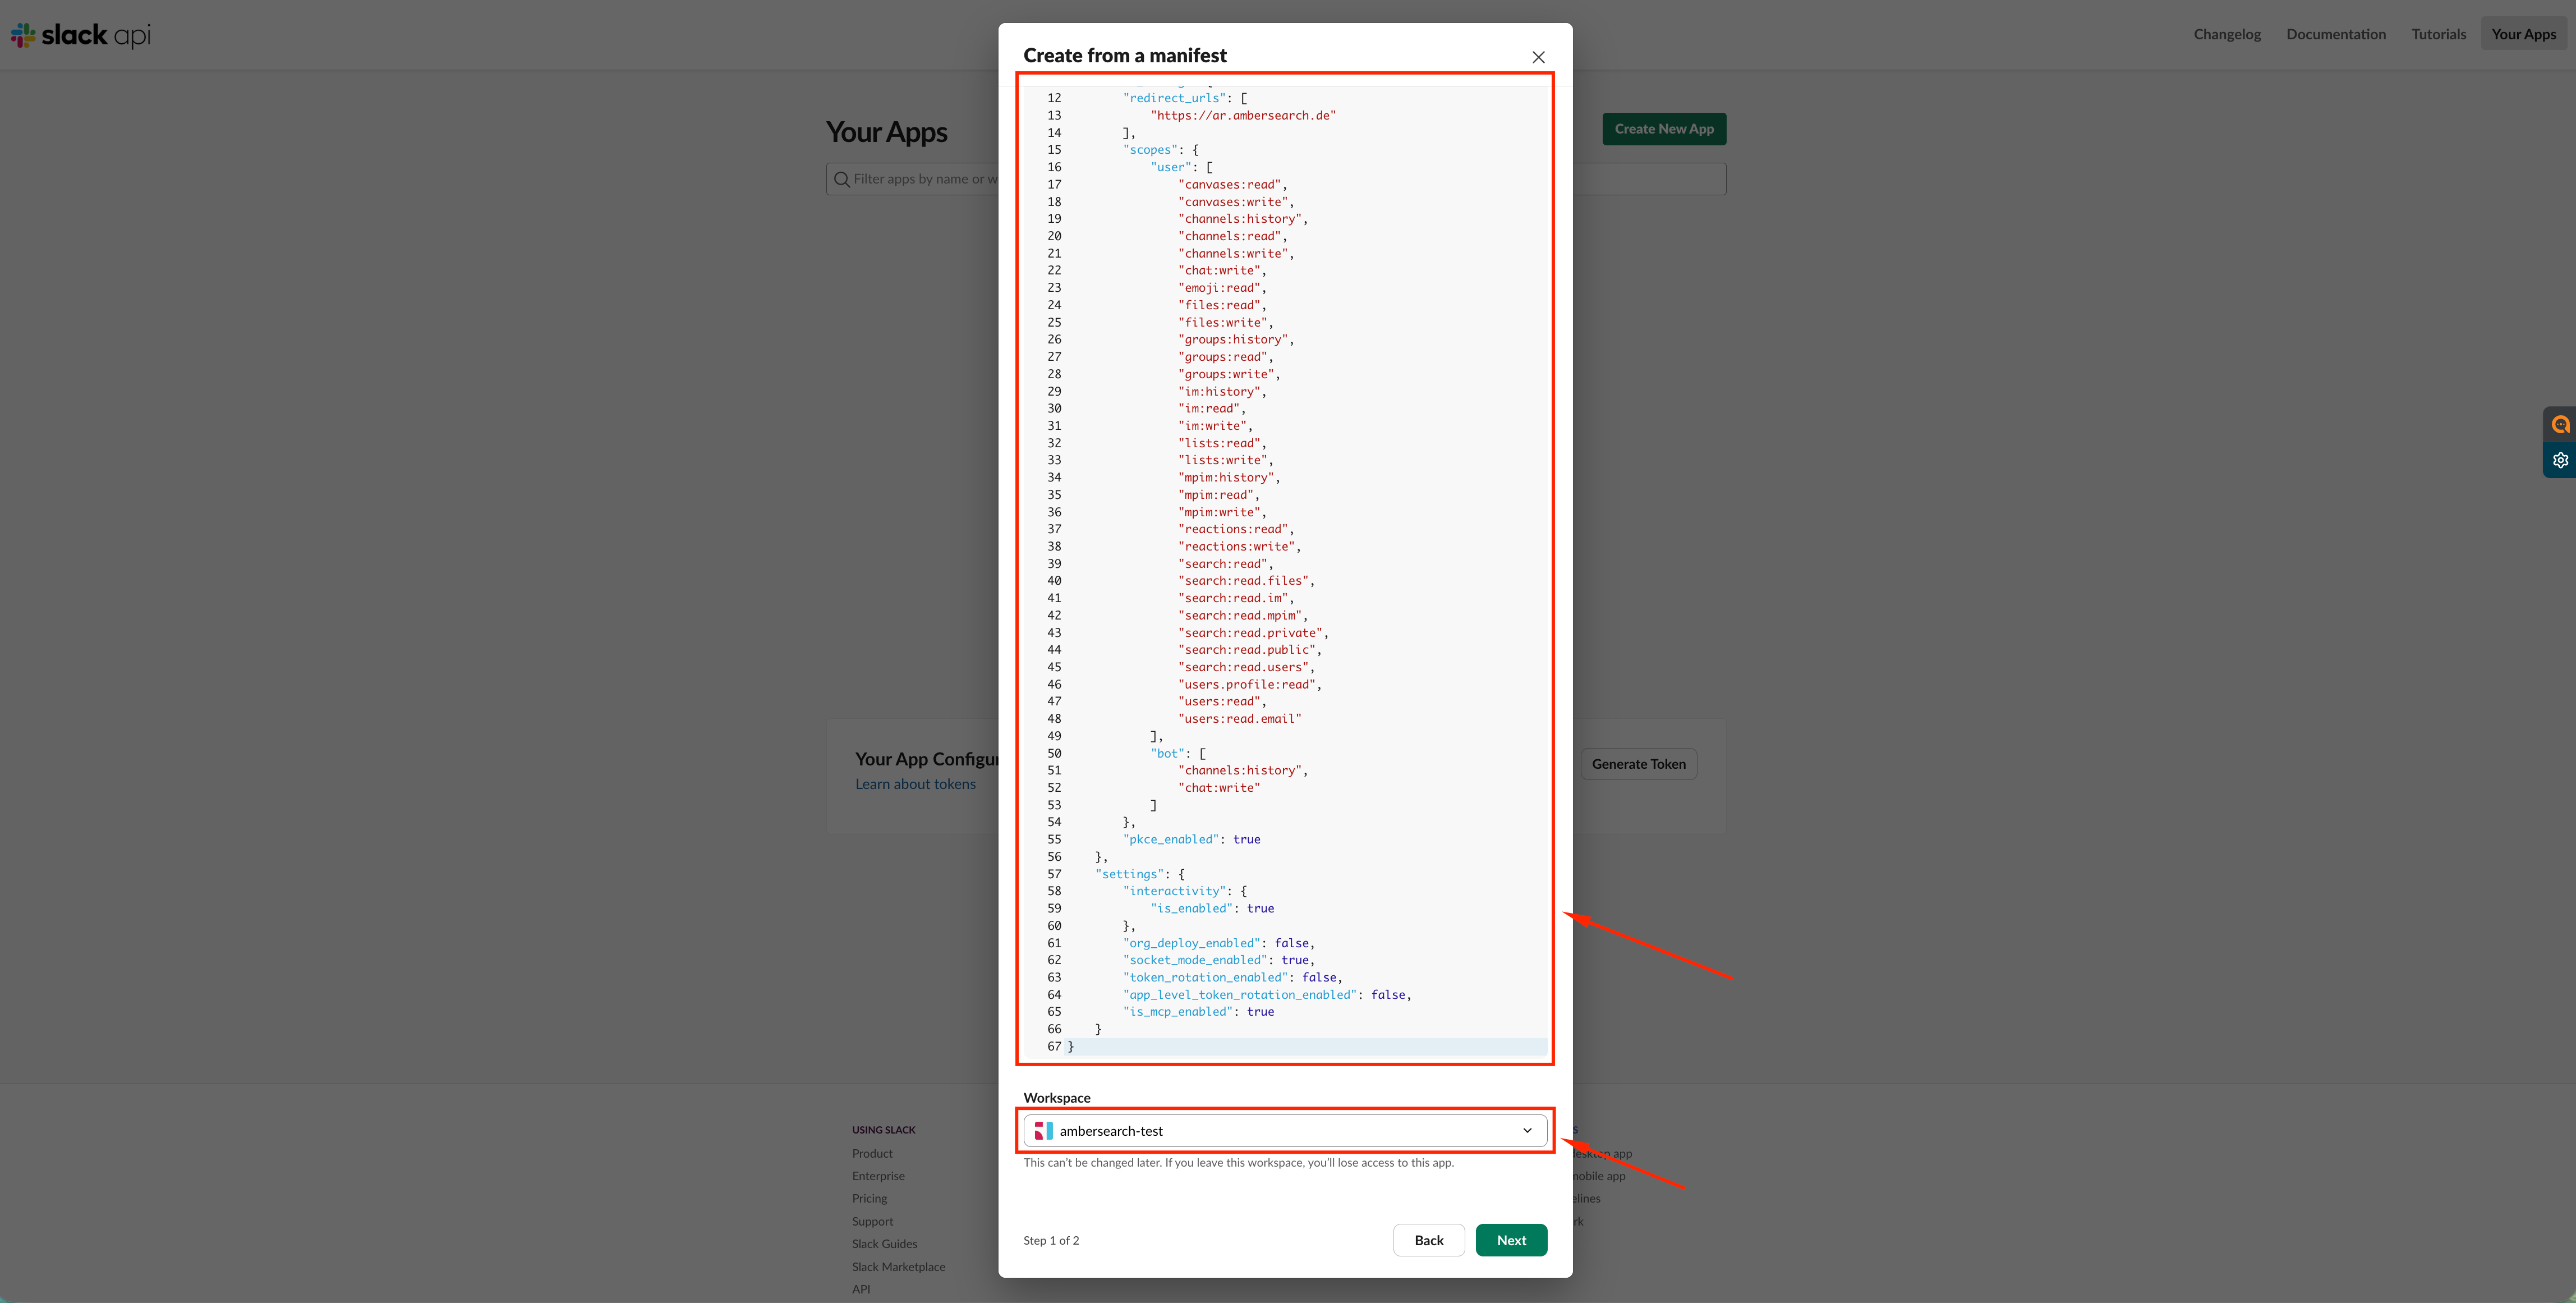
Insert the following JSON manifest and choose your company workspace, keep in mind to set the redirect url to the redirect url of your respective amber tenant:
{
    "display_information": {
        "name": "Ambersearch Slack MCP App"
    },
    "features": {
        "bot_user": {
            "display_name": "Ambersearch Slack MCP App",
            "always_online": false
        }
    },
    "oauth_config": {
        "redirect_urls": [
            "https://your-tenant.ambersearch.de/api/mcp/callback"
        ],
        "scopes": {
            "user": [
                "canvases:read",
                "canvases:write",
                "channels:history",
                "channels:read",
                "channels:write",
                "chat:write",
                "emoji:read",
                "files:read",
                "files:write",
                "groups:history",
                "groups:read",
                "groups:write",
                "im:history",
                "im:read",
                "im:write",
                "lists:read",
                "lists:write",
                "mpim:history",
                "mpim:read",
                "mpim:write",
                "reactions:read",
                "reactions:write",
                "search:read",
                "search:read.files",
                "search:read.im",
                "search:read.mpim",
                "search:read.private",
                "search:read.public",
                "search:read.users",
                "users.profile:read",
                "users:read",
                "users:read.email"
            ],
            "bot": [
                "channels:history",
                "chat:write"
            ]
        },
        "pkce_enabled": true
    },
    "settings": {
        "interactivity": {
            "is_enabled": true
        },
        "org_deploy_enabled": false,
        "socket_mode_enabled": true,
        "token_rotation_enabled": false,
        "app_level_token_rotation_enabled": false,
        "is_mcp_enabled": true
    }
}
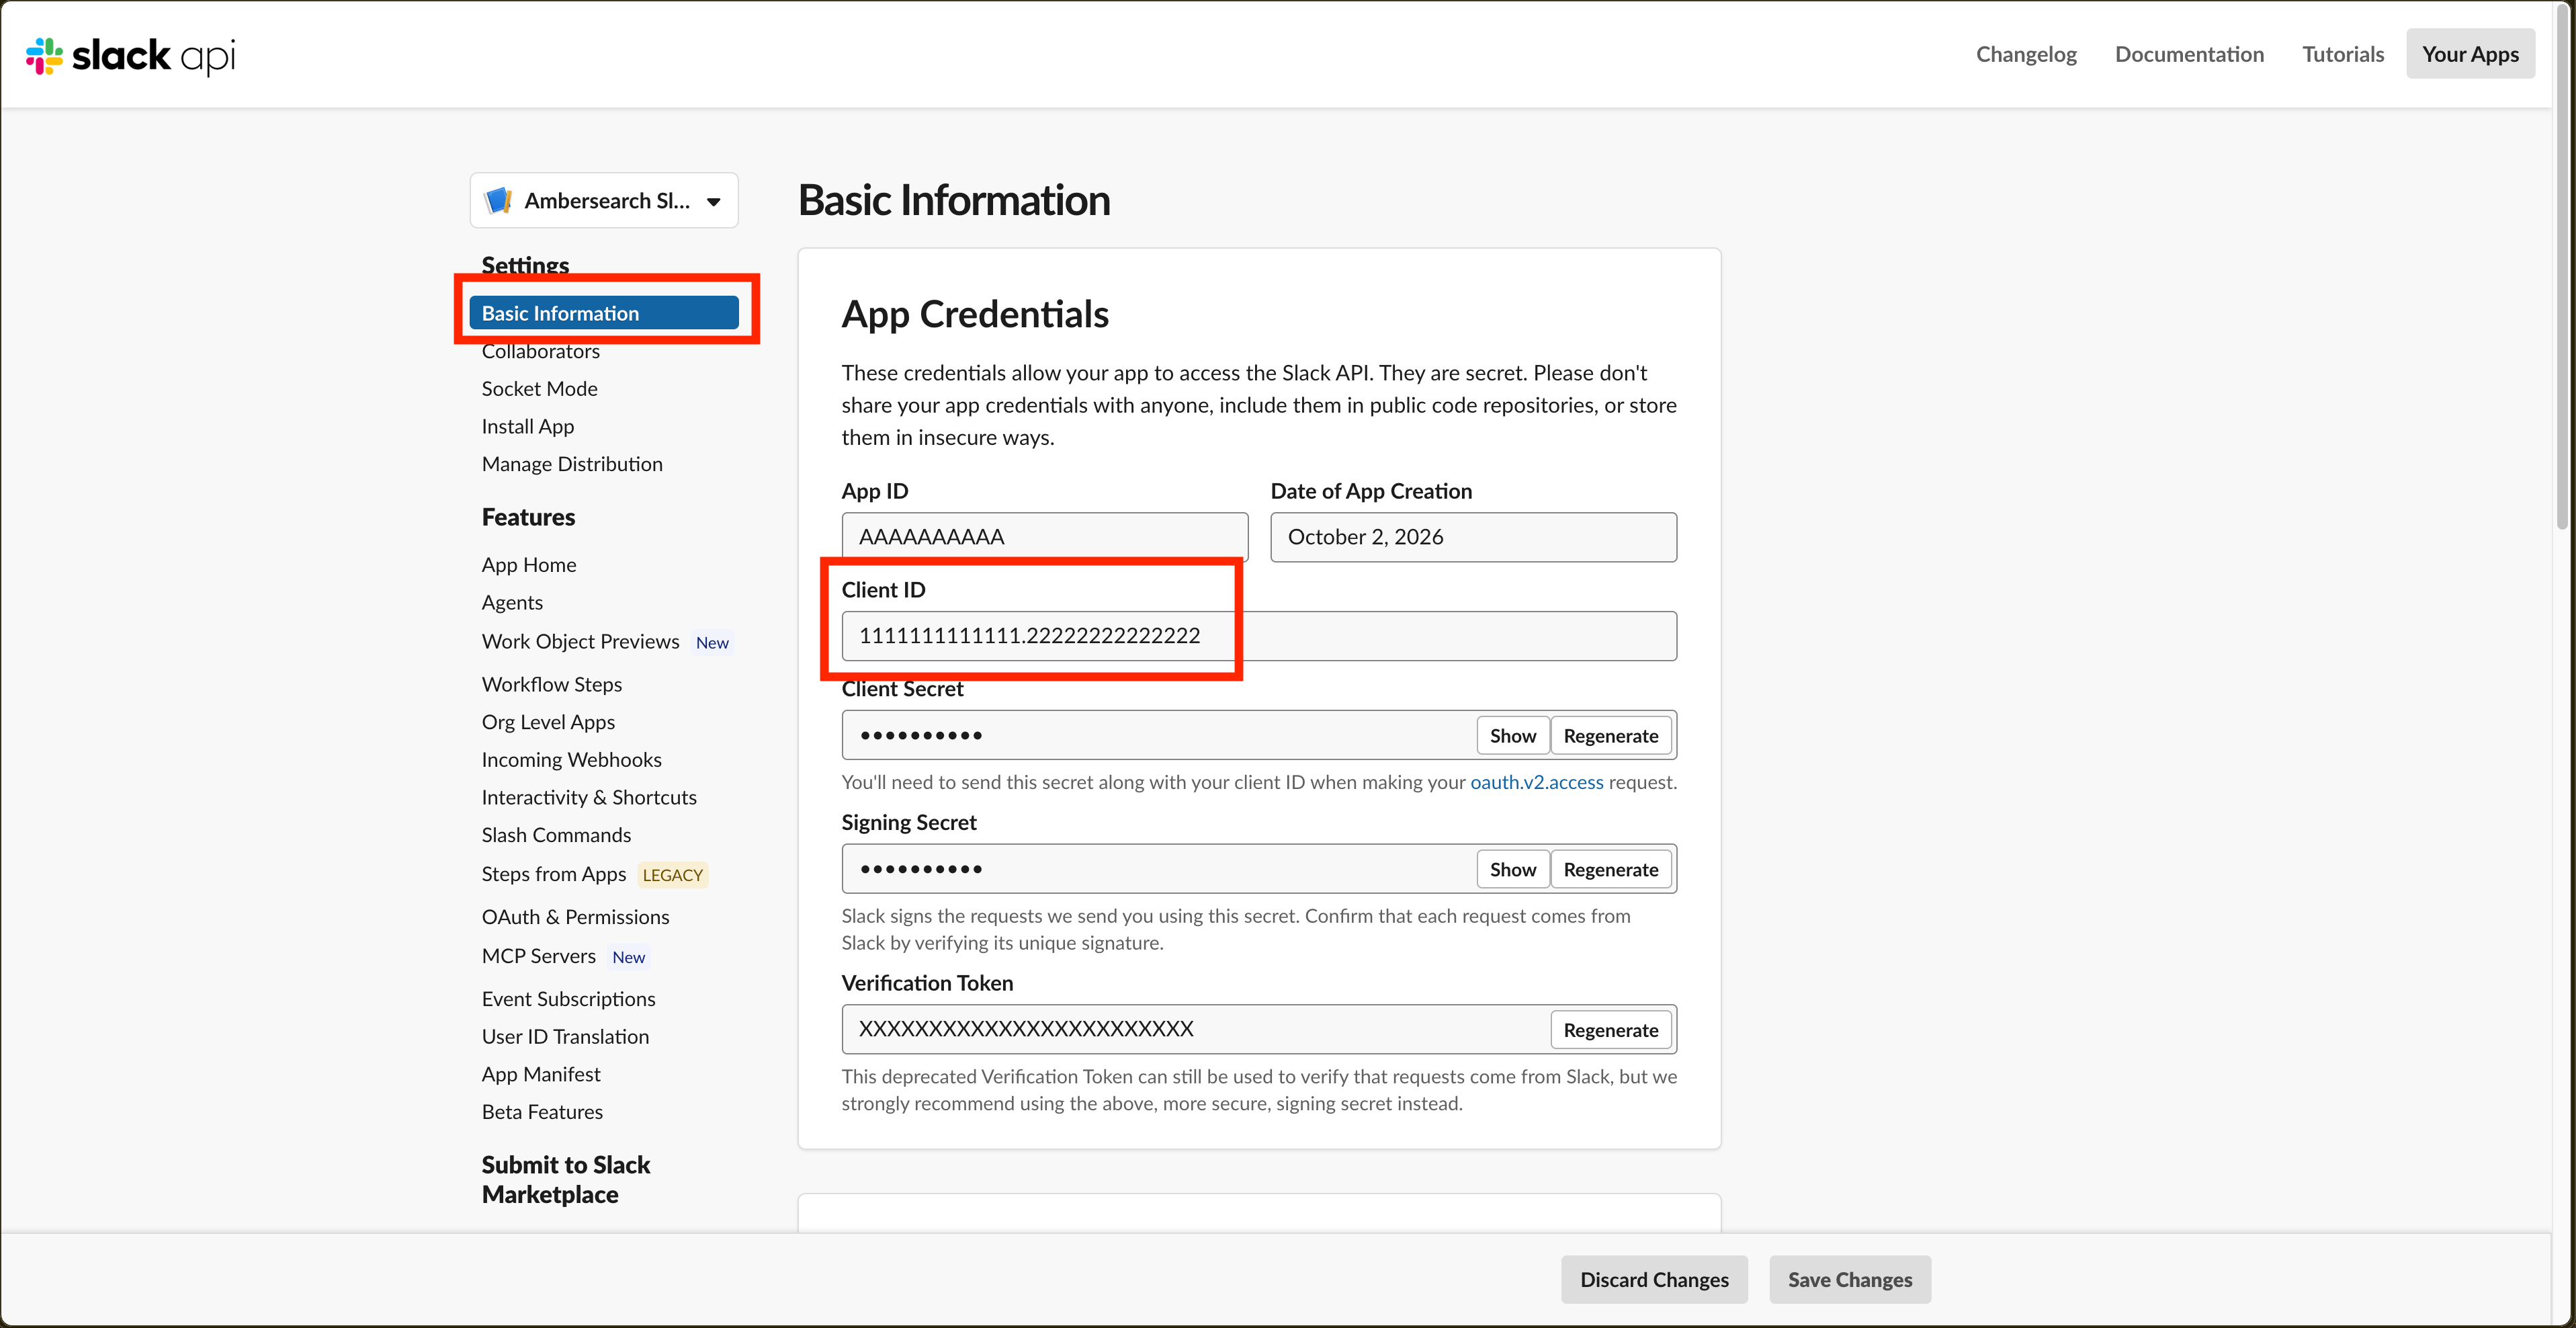
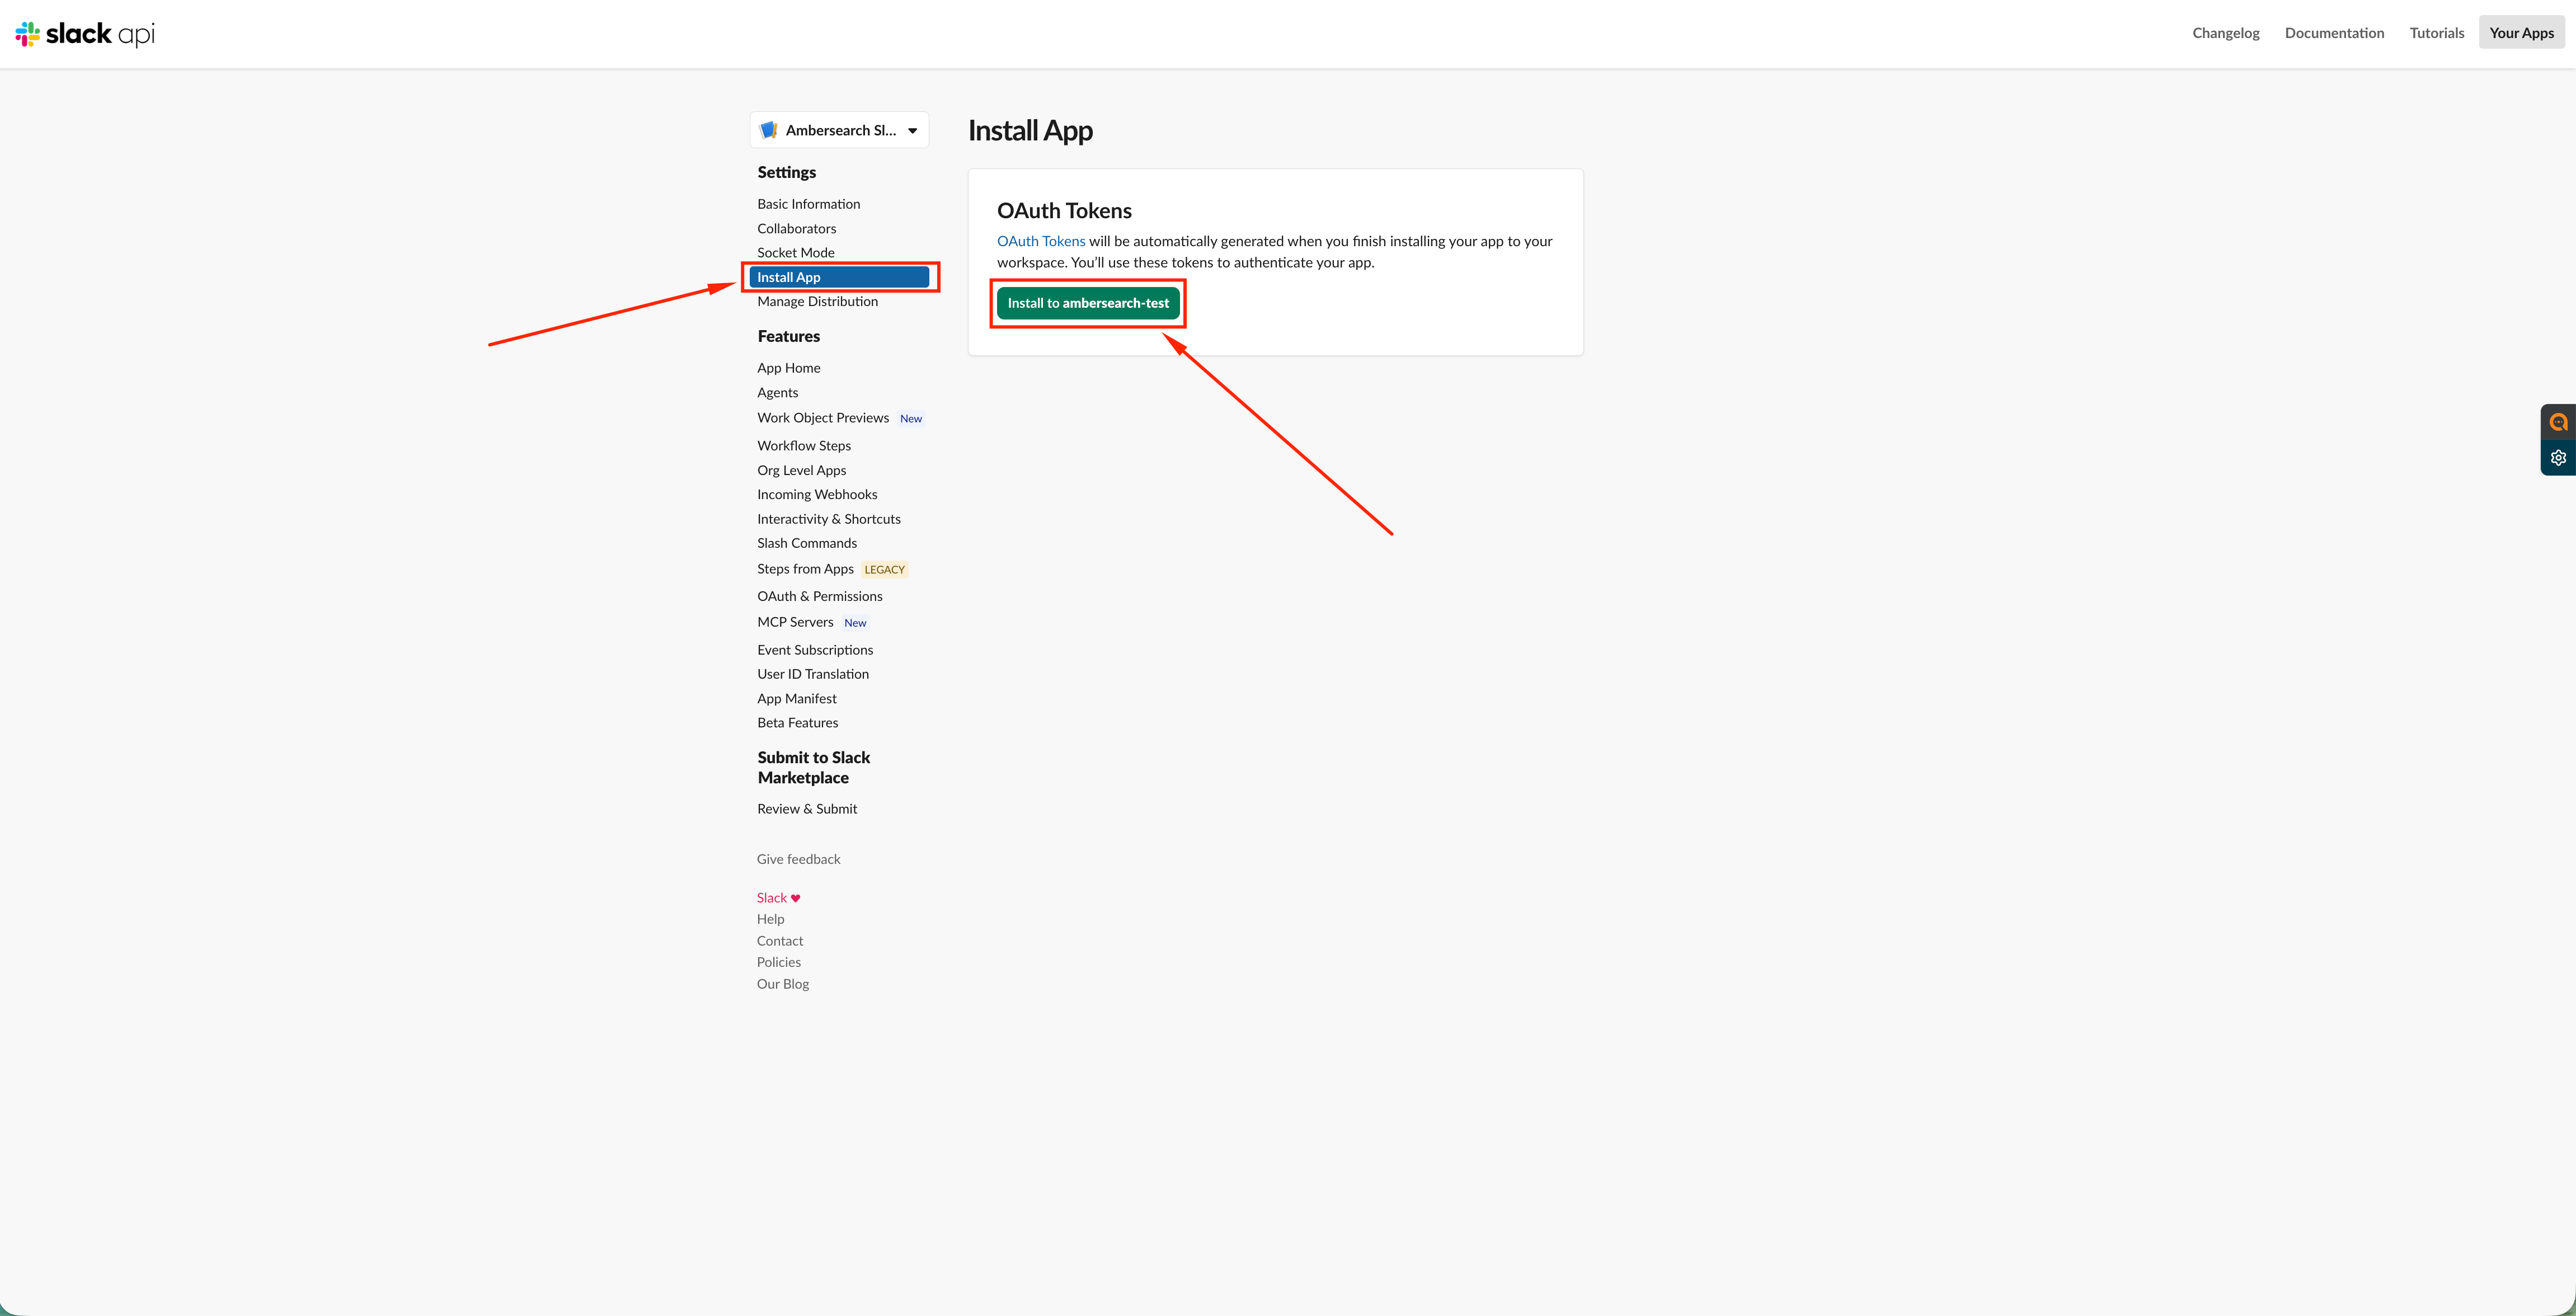
Once the app is created, proceed to install the application as showin in the last screenshot:
Set the Client ID provided in the basic app information in the amber Slack actions instance